Building a retaining wall is a rewarding project that can transform your landscape, control erosion, and create additional usable space. Whether you’re a seasoned DIY enthusiast or a beginner, this comprehensive guide will take you through the entire process, from planning to construction, ensuring proper drainage and stability, and avoiding common mistakes.
Planning Your Retaining Wall: Assessing Site and Soil
Assessing the Site
Before you start building your retaining wall, a thorough site assessment is crucial. This involves understanding the terrain, identifying any potential challenges, and planning the wall’s location and design.
- Determine the Purpose: Clearly define why you need the retaining wall. Is it for erosion control, creating a level area, or enhancing the aesthetic appeal of your garden? Knowing the purpose will guide your design choices.
- Measure the Area: Measure the length, height, and width of the area where you plan to build the wall. Accurate measurements are essential for estimating materials and ensuring the wall fits well within your landscape.
- Check for Utilities: Before you dig, check for any underground utilities such as gas, water, or electrical lines. Contact your local utility company for assistance.
Assessing the Soil
Soil type and conditions play a critical role in the stability and design of your retaining wall. Different soils have varying levels of load-bearing capacity and drainage properties.
- Soil Type: Identify the type of soil in your area—clay, sand, silt, or loam. Clay soils can expand and contract with moisture changes, affecting the wall’s stability, while sandy soils drain well but may require more support.
- Soil Stability: Assess the soil’s stability. Loose or unstable soil may need additional reinforcement, such as geogrid or tie-backs, to prevent the wall from collapsing.
- Drainage: Check how well the soil drains. Poor drainage can lead to water buildup behind the wall, increasing pressure and causing failure. Proper drainage solutions must be incorporated into your design.
Essential Tools and Materials for Building a Retaining Wall
Tools
Having the right tools is essential for a successful DIY retaining wall project. Here’s a list of tools you’ll need:
- Shovel: For digging the trench and moving soil.
- Level: To ensure the wall is straight and even.
- Tape Measure: For accurate measurements.
- Tamper: To compact the soil and base material.
- Wheelbarrow: For transporting materials.
- Chisel and Hammer: For cutting blocks or stones.
- Safety Gear: Gloves, goggles, and sturdy footwear for protection.
Materials
The materials you choose will depend on the type of retaining wall you plan to build. Here are some common materials:
- Base Material: Crushed stone or gravel for the foundation.
- Wall Blocks: Concrete blocks, stones, or bricks for the wall itself.
- Drainage Pipes: Perforated pipes to ensure proper drainage.
- Backfill Material: Gravel or crushed stone for backfilling behind the wall.
- Geotextile Fabric: To separate soil from the drainage material and prevent clogging.
Step-by-Step Construction Process
Step 1: Design and Layout
- Draw a Plan: Sketch your retaining wall design, including dimensions and materials. This plan will guide your construction process.
- Mark the Area: Use stakes and string to mark the outline of your retaining wall on the ground. Ensure the layout is straight and accurate.
Step 2: Excavation
- Dig the Trench: Dig a trench for the base of the wall. The trench should be deep enough to accommodate the base material and the first row of blocks. A general rule is to make the trench one-eighth the height of the wall plus 3 inches.
- Level the Base: Ensure the bottom of the trench is level. Use a tamper to compact the soil and create a solid foundation.
Step 3: Install the Base Material
- Add Crushed Stone: Fill the trench with a layer of crushed stone or gravel, about 6 inches deep. This base material provides stability and drainage.
- Compact the Base: Use a tamper to compact the crushed stone, ensuring it is level and firm.
Step 4: Lay the First Course
- Start at the Lowest Point: Begin laying the first course of blocks at the lowest point of the wall. This ensures stability and makes it easier to level subsequent courses.
- Level Each Block: Use a level to ensure each block is level from front to back and side to side. Adjust as needed by adding or removing base material.
Step 5: Build Up the Wall
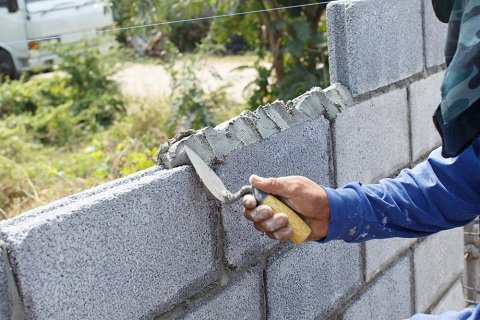
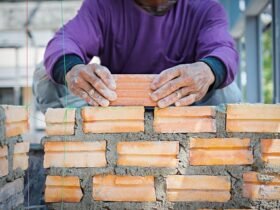
- Stagger the Joints: As you lay each subsequent course, stagger the joints to create a stronger, more stable wall. This is similar to the pattern used in bricklaying.
- Backfill as You Go: After laying each course, backfill behind the wall with gravel or crushed stone. This provides drainage and additional stability.
Step 6: Install Drainage System
- Add Drainage Pipes: Place perforated drainage pipes at the base of the wall, behind the first course of blocks. These pipes will direct water away from the wall.
- Cover with Gravel: Cover the drainage pipes with gravel or crushed stone. This helps prevent clogging and ensures proper water flow.
Step 7: Cap the Wall
- Install Capstones: Once you’ve reached the desired height, install capstones to finish the top of the wall. Use construction adhesive to secure them in place.
- Ensure Stability: Double-check the stability and alignment of the entire wall. Make any necessary adjustments to ensure it is straight and secure.
Ensuring Proper Drainage and Stability
Drainage
Proper drainage is critical for preventing water buildup behind the retaining wall, which can increase pressure and lead to failure.
- Weep Holes: Incorporate weep holes into the wall design to allow water to escape. These are small openings spaced along the length of the wall.
- Backfill with Gravel: Use gravel or crushed stone for backfilling, as these materials provide excellent drainage compared to soil.
- Drainage Pipes: As mentioned earlier, install perforated drainage pipes at the base of the wall to direct water away.
Stability
Ensuring the stability of your retaining wall involves proper construction techniques and materials.
- Geogrid Reinforcement: For taller walls, consider using geogrid reinforcement. This synthetic material is placed between layers of blocks and extends back into the soil, providing additional stability.
- Proper Compaction: Compact the base material and backfill thoroughly. This prevents settling and shifting that can compromise the wall’s stability.
- Check Levels: Continuously check the level of each course during construction to ensure the wall remains straight and even.
Common DIY Mistakes and How to Avoid Them
Inadequate Planning
- Solution: Take the time to plan thoroughly. Assess the site, measure accurately, and design a detailed plan before starting construction.
Poor Drainage
- Solution: Always include a proper drainage system in your design. Use gravel or crushed stone for backfill, incorporate weep holes, and install drainage pipes.
Insufficient Base Material
- Solution: Use a sufficient depth of crushed stone or gravel for the base. This provides stability and helps with drainage.
Incorrect Block Placement
- Solution: Ensure each block is level and properly aligned. Stagger the joints and backfill as you go to maintain stability.
Ignoring Soil Conditions
- Solution: Assess the soil type and stability before construction. Consider reinforcement options for unstable or loose soil.
Additional Considerations
Permits and Regulations
Check local building codes and regulations before starting your project. Some areas may require permits or have specific guidelines for retaining walls, especially those over a certain height.
Professional Help
While many DIY enthusiasts can successfully build small to medium-sized retaining walls, larger or more complex projects may require professional assistance. Hiring a qualified contractor or engineer can ensure your wall is built to last and meets all safety standards.
Landscaping Integration
Consider how your retaining wall will integrate with the rest of your landscape. Plan for plantings, lighting, and other features that will enhance the wall’s appearance and functionality.
FAQs about Retaining Wall
Concrete blocks are a popular choice for DIY retaining walls due to their strength, durability, and ease of installation. However, other materials such as timber, stone, and brick can also be used depending on your preference and the wall’s purpose.
The height at which you need a permit varies by location. Generally, retaining walls over 4 feet high require a permit and professional engineering. Always check local building codes before starting your project.
Yes, retaining walls are often built on slopes to create level areas and prevent erosion. Proper planning, drainage, and construction techniques are crucial for stability.
Proper planning, using quality materials, ensuring good drainage, and regular maintenance are key to a long-lasting retaining wall. Inspect the wall periodically for signs of damage and address any issues promptly.
Gravel or crushed stone is ideal for backfilling retaining walls. These materials provide excellent drainage, reducing the risk of water buildup and pressure behind the wall.
To prevent collapse, ensure proper drainage, use sufficient base material, compact the soil and backfill thoroughly, and consider reinforcement options such as geogrid for taller walls.Is it necessary to have a professional engineer design my retaining wall?
For small to medium-sized walls, a DIY approach with careful planning and proper techniques is often sufficient. However, for taller or more complex walls, especially those over 4 feet high, professional engineering is recommended to ensure stability and safety.
Conclusion
By following this comprehensive guide, you can successfully build a sturdy and attractive retaining wall that enhances your landscape and provides long-lasting benefits. Happy building!


